
How to Clean and Maintain Painted Kitchen Cabinets
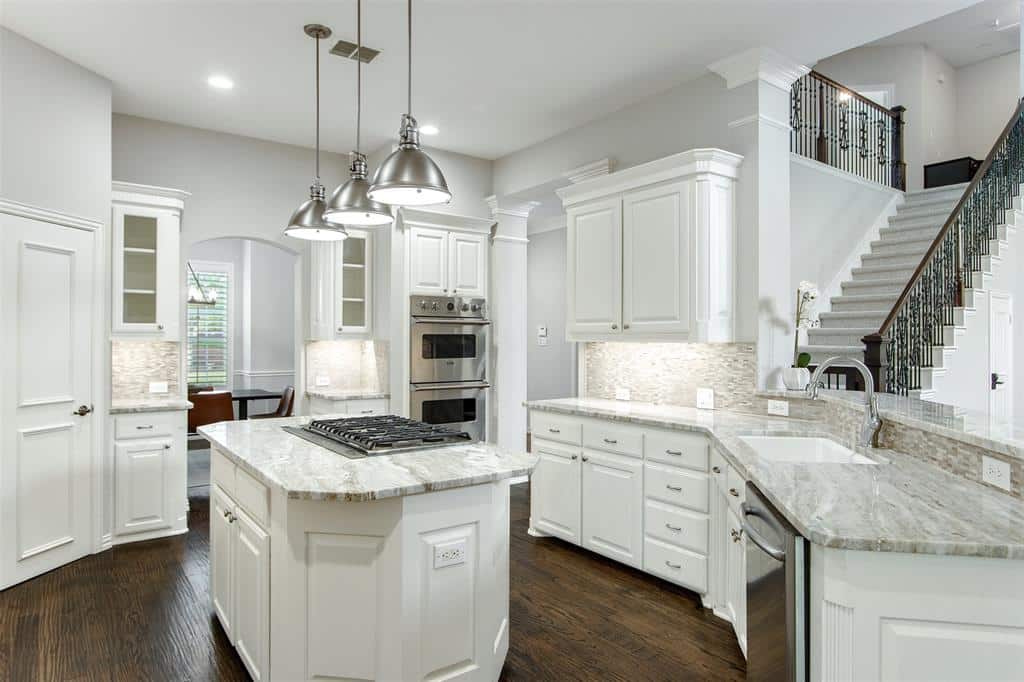
Painted kitchen cabinets represent a significant investment, and how you maintain them determines how long that investment holds up. According to the National Kitchen and Bath Association, high-end, well-maintained cabinets can last as long as the house itself. The opposite is also true. Poor cleaning habits, the wrong products, and inconsistent upkeep are among the fastest ways to shorten a painted cabinet's lifespan, regardless of the quality of the original paint job.
Painted surfaces require a different approach than stained or natural wood finishes. The paint film is what protects the wood underneath, and it is more vulnerable to abrasion, harsh chemicals, and moisture than most homeowners realize. Using the wrong cleaner or cleaning method can dull the finish, strip the sheen, or cause the paint to break down prematurely.
Here is a practical guide to how to clean painted kitchen cabinets correctly, what products to use, what to avoid, and how to maintain them so the finish stays sharp for years.
Why Painted Cabinets Need a Specific Cleaning Approach
The key distinction with painted cabinets is that you are cleaning a paint film, not a raw surface. That film has a finish, typically satin or semi-gloss, that can be dulled, scratched, or chemically degraded by the wrong cleaning approach. Once the finish is compromised, the cabinet loses both its appearance and its resistance to future staining and moisture.
Kitchen cabinets face a specific combination of challenges that most other painted surfaces in a home do not. Heat from cooking opens the pores of the paint slightly and makes it more receptive to grease absorption. Steam and humidity introduce moisture that can work its way into the wood if the finish is damaged. And the frequency of hand contact around handles and edges means those areas accumulate oils and grime consistently.
Understanding this is what makes proper kitchen cabinet care different from simply wiping down a painted wall. The surface needs to be cleaned thoroughly but gently, dried completely, and treated in a way that preserves the integrity of the finish rather than working against it.
The Right Cleaning Supplies
The tools and products you use matter as much as the technique. Most damage to painted cabinets comes from reaching for the wrong cleaner rather than from cleaning too frequently.
What to Use
A soft microfiber cloth is the right tool for all cabinet cleaning. Microfiber picks up grease and grime without scratching the paint surface and does not leave lint or residue behind. For routine
cleaning, warm water and a few drops of mild dish soap are sufficient. This combination is gentle enough to use regularly without degrading the finish.
For heavier grease buildup, a diluted solution at a ratio of 10 parts water to 1 part solution is a professional-grade option that cuts through cooking grease without damaging the paint. Always dilute it as directed and rinse the surface with clean water afterward. For stubborn stains, a paste made from baking soda and a small amount of water applied with a soft cloth and a gentle circular motion can help without resorting to abrasive products.
What to Avoid
Harsh scrubbers are one of the most common causes of paint damage on kitchen cabinets. They are technically a very fine abrasive, and while they work effectively on many surfaces, on painted cabinets, they scuff and dull the finish, sometimes removing it in visible patches. Do not use them regardless of what the stain is.
Bleach and bleach-based cleaners break down paint chemically and will cause discoloration and finish deterioration with repeated use. Abrasive sponges, steel wool, and scrubbing pads cause the same physical damage. Wood-specific cleaners and polish products are also problematic because they often contain waxes and oils that build up on painted surfaces and create a film that attracts more grime over time.
Excess water is another issue that gets overlooked. Cabinets are wood underneath the paint, and saturating them during cleaning allows moisture to seep into seams, joints, and any area where the paint film has even minor gaps. The cloth should be damp, never dripping.
How to Clean Painted Kitchen Cabinets Step by Step
Routine Cleaning
For everyday maintenance, wipe down cabinet surfaces with a dry or barely damp microfiber cloth to remove dust and light surface debris. Do this weekly on the exterior faces, paying particular attention to the areas around handles and pulls where hand oils accumulate most.
For any visible splatters or light grime, a damp cloth with a small amount of dish soap is all that is needed. Wipe in a consistent direction rather than scrubbing in circles, rinse with a second cloth dampened with clean water, and immediately dry the surface with a soft towel. Leaving moisture to air dry on painted cabinets invites water spots and, over time, damage to the finish and the wood.
Deep Cleaning for Grease Buildup
Grease on painted cabinets builds up gradually, especially on cabinets near the stovetop. The buildup is not always obvious until it becomes sticky or starts to yellow, which is why periodic deep cleaning matters even when surfaces look relatively clean.
Mix your cleaning solution, whether dish soap and warm water or a diluted solution, and apply it with a damp microfiber cloth. Work in small sections, one cabinet door at a time. Use gentle circular pressure on areas with heavier buildup, but keep the pressure light. Rinse each section with a clean, damp cloth before moving to the next, and dry each section completely before the cleaning solution has a chance to sit.
The inside corners, edges around hardware, and the top surfaces of upper cabinets are the areas that accumulate the most neglected buildup. A soft-bristled toothbrush dipped lightly in your cleaning solution can reach into those tight spots without scratching the surrounding paint.
Dealing With Stubborn Stains
Coffee, red wine, and mustard are three of the most stubborn staining agents on painted cabinet surfaces. The faster these are addressed, the less likely they are to cause permanent damage. A stain that has been sitting for hours or days is significantly harder to lift than one that is still fresh.
For set stains, apply a small amount of baking soda paste to the area and let it sit for a few minutes before wiping gently with a soft cloth. If that does not fully lift it, a slightly less diluted cleaning solution applied with a soft cloth and light pressure is the next step. Do not escalate to abrasive products. If a stain cannot be removed without abrasion, the area may need to be touched up rather than cleaned more aggressively.
Painted Cabinet Maintenance Between Cleanings
Cleaning is only part of the equation. The habits that happen between cleaning sessions have a significant effect on how long the finish holds up.
Wipe Spills Immediately
This is the single most effective painted cabinet maintenance habit. Any spill, splatter, or grease contact that is wiped away while still fresh takes seconds to address and leaves no trace. The same spill left overnight may require significant effort to remove and can leave a permanent
mark, depending on what it was. Keep a soft cloth within reach of the kitchen so the barrier to immediate cleanup is as low as possible.
Use a Range Hood Consistently
A functioning range hood vented to the outside captures cooking grease before it settles on cabinet surfaces. Homeowners who cook frequently without using a range hood are accelerating the rate at which grease builds up on their cabinets, particularly on the cabinet directly above the stove. It is one of the most overlooked factors in kitchen cabinet care.
Avoid Excess Moisture Near the Sink
Cabinets near the sink are the most vulnerable to moisture-related damage. Water that splashes onto the cabinet face and is not wiped away works its way into any crack or gap in the finish. Over time, this causes the paint to lift and the wood to swell. Dry any water contact on cabinet surfaces near the sink as part of the regular kitchen cleanup routine.
Touch Up Chips and Scratches Promptly
A small chip in the paint finish is not just a cosmetic interior paint issue. It is an entry point for moisture and grease to reach the wood beneath the paint. Small chips touched up with matching paint when they first appear stay small. Left untreated, they tend to grow as moisture gets underneath the surrounding paint film and causes it to lift further.
Keep a small amount of the original cabinet paint or a close match on hand for this purpose. A fine artist's brush applied carefully to the chip, allowed to dry fully, and lightly feathered at the edges, is usually enough to make the repair nearly invisible.
How Often to Clean Painted Kitchen Cabinets
Frequency depends on how often the kitchen is used and how much cooking is done, but a general schedule holds up across most households.
Spot cleaning for fresh spills should happen immediately. A light wipe down of exterior surfaces with a dry or barely damp cloth should happen weekly. A full cleaning with a soap solution, paying attention to handles, edges, and areas near the stove, should happen monthly. A thorough deep clean, including the inside of cabinets and the tops of upper cabinet boxes, where grease and dust accumulate heavily, should happen every three to six months.
Sticking to this schedule prevents the kind of heavy buildup that requires aggressive cleaning and risks damaging the finish. It also keeps the cabinets looking consistently sharp rather than cycling between obviously dirty and freshly cleaned.
Cabinet Painting Services from Fresh Coat Painters of Cincinnati East
At Fresh Coat Painters of Cincinnati East, we paint kitchen cabinets using products and processes built to hold up to daily kitchen use. If your current cabinets are showing wear, losing their finish, or simply ready for a color change, our team can assess the condition and deliver results that look clean and last.
Reach out today for a free quote and find out what professionally painted kitchen cabinets look like when the right products and preparation are in place from the start.