How to Clean Walls Before Painting for Best Results
Cleaning walls before painting is the step most homeowners treat as optional. It is not. According to an industry analysis, at least 40% of all paint adhesion failures trace directly back to poor surface preparation, with the actual figure likely higher.
Most walls look clean. That is the problem. The oils left by hand contact around light switches and door frames, the grease that migrates from cooking and settles on nearby surfaces, the dust that accumulates in corners and along baseboards over months and years, none of it is always visible. But all of it is present, and all of it interferes with how paint adheres to the wall.
Here is a step-by-step breakdown of how to clean walls before painting correctly, what products work for different situations, and what to watch for in rooms that need more than a standard wipe-down.
Why Wall Cleaning Directly Affects Paint Adhesion
Paint bonds to a surface through a combination of mechanical and chemical adhesion. For that bond to form correctly, the surface needs to be clean, dry, and free of any contaminant that would sit between the paint film and the substrate.
When paint is applied over dust, grease, or residue, it bonds to the contaminant rather than the wall. That contaminant eventually breaks down or is released, and the paint goes with it. The result is peeling, flaking, or uneven coverage that appears within months of a fresh paint job. No amount of premium paint or skilled application can compensate for what the wall-cleaning step failed to remove.
This is why washing walls before painting is not about making the surface look presentable. It is about creating the physical conditions that allow paint to adhere correctly and last the way it should.
What You Need Before You Start
Wall prep before painting does not require specialized equipment, but having the right supplies organized before you begin makes the process faster and more thorough.
You will need two buckets, one for your cleaning solution and one for clean rinse water. A set of microfiber cloths or non-abrasive sponges handles most surfaces without scratching. A dry dust mop or vacuum with a brush attachment covers the initial dry dusting phase. Mild dish soap is sufficient for most interior walls. For greasier surfaces, trisodium phosphate, commonly called TSP, or a diluted TSP substitute, handles heavier contamination. Rubber gloves protect your hands during the washing process, particularly when using TSP.
Have drop cloths or plastic sheeting down before you start. Cleaning solutions drip, and water on a hardwood or laminate floor during the prep phase creates a mess that slows the whole job down.
Step One: Dry Dust the Walls First
Washing a dusty wall before dry dusting it first is a mistake that turns dust into a muddy film that is harder to remove than either dust or dirt on its own. Always start dry.
Work from the top of the wall down. Use a dry microfiber cloth, a clean dust mop, or a vacuum with a soft brush attachment to pull dust, cobwebs, and loose debris off the surface. Pay close attention to the corners where walls meet the ceiling, the area along the baseboard, and the surfaces around vents and returns where dust accumulates fastest.
Once the dry dusting is done, remove any wall hangings, outlet covers, and switch plates. These areas trap dust and grease underneath them and need to be cleaned directly rather than painted around. Taping over electrical outlets with painter's tape at this point protects them from moisture during the washing phase.
Step Two: Wash the Walls
With the surface dry-dusted, cleaning walls for paint adhesion addresses the contamination that does not come off with dry contact: grease, cooking residue, hand oils, and environmental buildup.
Standard Interior Walls
For most interior walls in living rooms, bedrooms, and hallways, a mild solution of warm water and a few drops of dish soap is all that is needed. The solution should feel slightly slippery but not heavily soapy. Dip your sponge or cloth into the solution, wring it out so it is damp rather than wet, and wipe the wall in consistent strokes, working from top to bottom.
Use the second bucket of clean water and a separate cloth to rinse each section before moving to the next. Leaving soap residue on the wall creates a film that can affect how paint absorbs into the surface. Rinse, then move on. Do not let the cleaning solution sit on the wall and dry.
Kitchen Walls
Kitchen walls near the stove and countertops accumulate grease that is invisible to the eye but highly disruptive to paint adhesion. Standard dish soap handles light grease, but walls that have not been thoroughly cleaned in some time likely need a stronger solution.
TSP or a TSP substitute mixed according to the package instructions cuts through cooking grease more effectively than dish soap. Apply it with a damp sponge, let it work for a minute on heavier buildup, then wipe and rinse thoroughly. TSP leaves no residue when rinsed correctly, and it provides a slightly etched surface that improves paint adhesion on glossy or heavily contaminated areas. Wear rubber gloves when working with TSP, as it is a skin irritant with prolonged contact.
Bathroom Walls
Bathrooms present two specific challenges: soap scum and mildew. Soap scum, the white film that builds up on surfaces near the sink and tub, is a combination of mineral deposits and soap residue. It resists standard dish soap. A solution of equal parts white vinegar and warm water cuts through it effectively without damaging the wall surface.
Mildew is the more serious concern, especially in cabinets. Any visible mildew must be treated before painting, not painted over. Mildew painted over without treatment will grow through the new paint film within months. A solution of one part bleach to three parts water applied with a sponge, left for ten minutes, and rinsed thoroughly kills mildew spores on the surface. The area must be completely dry before any primer or paint is applied.
Walls With Heavy Staining or Smoke Damage
Nicotine and smoke residue from years of indoor smoking are among the most challenging wall contaminations to address before painting. It is oily, penetrates deep into porous surfaces, and bleeds through standard paint films even after multiple coats. TSP washing followed by a dedicated stain-blocking primer is the correct approach. Attempting to cover smoke-stained walls with paint alone without this process will result in the staining bleeding through the new finish.
For walls with heavy water staining from past leaks, the stain itself should be treated with a stain-blocking primer after cleaning rather than attempting to wash it out. Water stains are mineral deposits in the wall surface, not surface contamination, and washing them will not eliminate them.
Step Three: Rinse Thoroughly
This step gets skipped more often than it should. Cleaning solution left on the wall as it dries creates a residue layer that can affect paint adhesion in the same way grease or dust does. The whole point of washing walls before painting is to create a clean, uncontaminated surface.
Leaving soap or TSP residue undoes part of that work.
After washing each section, go over it with a clean sponge or cloth dampened with plain warm water. Work in the same top-to-bottom pattern. Change the rinse water when it becomes cloudy or feels soapy, which happens faster than most people expect. A clean rinse requires clean rinse water.
Step Four: Allow Adequate Drying Time
Paint applied over a damp wall will blister, bubble, or fail to adhere correctly. The wall must be completely dry before any primer or paint touches it. This is not a step to rush.
In normal indoor conditions with reasonable airflow, walls that have been washed and rinsed need at least two to four hours to dry fully. In humid conditions, higher humidity rooms, or during wet weather, the window extends. Running a fan to circulate air in the room speeds the drying process. If there is any doubt about whether the surface is dry, wait longer. The cost of waiting an extra hour is zero. The cost of painting over a damp surface is a failed paint job.
Room-Specific Considerations for Wall Prep Before Painting
High-Traffic Areas
Hallways, stairwells, and entryways accumulate more hand contact and general wear than other areas of the home. The area around light switches and door frames, in particular, collects years of skin oils that are invisible but create a barrier to paint adhesion. These areas benefit from a second pass with a TSP solution, even if the rest of the wall only needs a standard dish soap wash.
Children's Rooms
Walls in children's rooms often have crayon, marker, or adhesive residue from stickers and tape. Standard soap and water will not remove these. Crayon and wax-based marks can be lifted with a small amount of mineral spirits on a cloth, but the area should be wiped clean with soapy water afterward and allowed to dry completely before priming. Marker and adhesive residue may require a stain-blocking primer to prevent bleed-through, regardless of how thoroughly it is cleaned.
Newly Skimmed or Patched Drywall
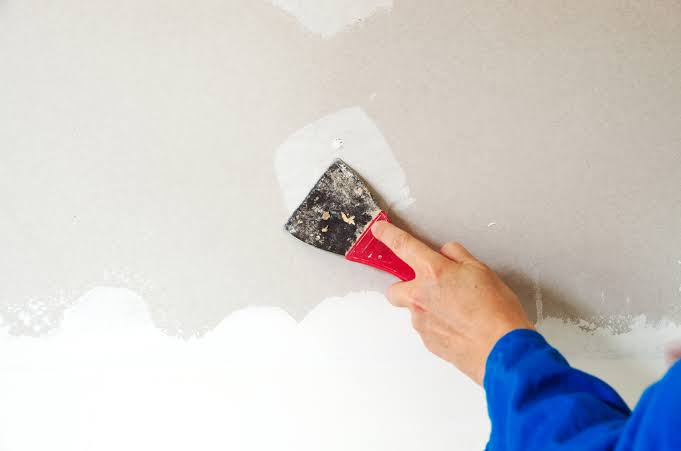
Freshly patched or skim-coated drywall does not need washing in the traditional sense, but it does need to be dust-free before priming. Joint compound dries to a fine powder at the surface that can prevent the primer from bonding correctly. Wipe patched areas gently with a dry microfiber cloth, then apply a drywall primer or PVA sealer before the finish coat. Skipping this step results in the patched areas absorbing paint at a different rate than the surrounding wall, which shows as visible dull spots in the finished surface.
Interior Painting Services from Fresh Coat Painters of West Omaha
At Fresh Coat Painters of West Omaha, wall cleaning is part of every interior project we take on, not an upsell or an afterthought. It is the step that determines whether the work holds up. We prepare every surface correctly before a drop of paint goes on because that is the only way to deliver a result that actually lasts.